The Ultimate Grilled Veggie Sandwich Recipe: A Healthy Delight

When it comes to creating a dish that is both delightfully tasty and heartily healthy, few things can beat the classic Grilled Veggie Sandwich. It’s a go-to recipe for anyone looking to enjoy a meal that is not just nourishing but also packed with flavors. In this comprehensive guide, we’ll dive into the art and science of crafting the perfect Grilled Veggie Sandwich recipe, ensuring that every bite is a testament to the rich tapestry of textures and tastes that vegetables can offer when prepared with care and creativity.
The Foundation of Flavor: Veggie Selection and Preparation
At the heart of any Grilled Veggie Sandwich are the vegetables. The beauty of this dish lies in its versatility; you can tailor it to suit your taste preferences or make the most of what’s seasonally available. Common choices include bell peppers, zucchini, eggplant, and mushrooms, but feel free to experiment with others like asparagus, red onion, or artichokes.
Preparation is key. Begin by washing your vegetables thoroughly. Slice them into uniform pieces to ensure even cooking. Marinating them for at least 30 minutes in a mixture of olive oil, balsamic vinegar, garlic, salt, and pepper can elevate the flavors to new heights. This marination not only infuses them with robust flavors but also helps achieve that perfect char and tenderness upon grilling.
Mastering the Grill: Achieving the Perfect Char
Grilling the vegetables is where the magic happens. Whether you’re using an outdoor grill or a stovetop grill pan, the goal is to cook the veggies to perfection—tender on the inside with a slightly crispy, charred exterior. Preheat your grill to medium-high heat to ensure the veggies don’t become soggy. Place the vegetables on the grill and let them cook undisturbed for a few minutes on each side. The hallmark of a well-grilled veggie is those beautiful grill marks that not only look appetizing but also add a smoky flavor.
Patience is crucial; don’t rush the grilling process. Each vegetable has its own cooking time; bell peppers and eggplants may take a bit longer than zucchini or asparagus. Keeping an eye on them and turning them occasionally will ensure they are grilled to perfection.
The Bread: Choosing the Right Base
While the grilled vegetables are undoubtedly the stars of the show, choosing the right bread can make or break your Grilled Veggie Sandwich. A good sandwich bread should be sturdy enough to hold the fillings without getting soggy. Ciabatta, sourdough, and whole grain breads are excellent choices for their texture and ability to complement the flavors of the grilled veggies.
Before assembling the sandwich, lightly toasting the bread on the grill or in a toaster adds a crispy dimension that contrasts beautifully with the tender vegetables. This step is not just about texture but also about enhancing the bread’s inherent flavors, making it a worthy component of the sandwich.
Layering for Success: Assembling the Grilled Veggie Sandwich
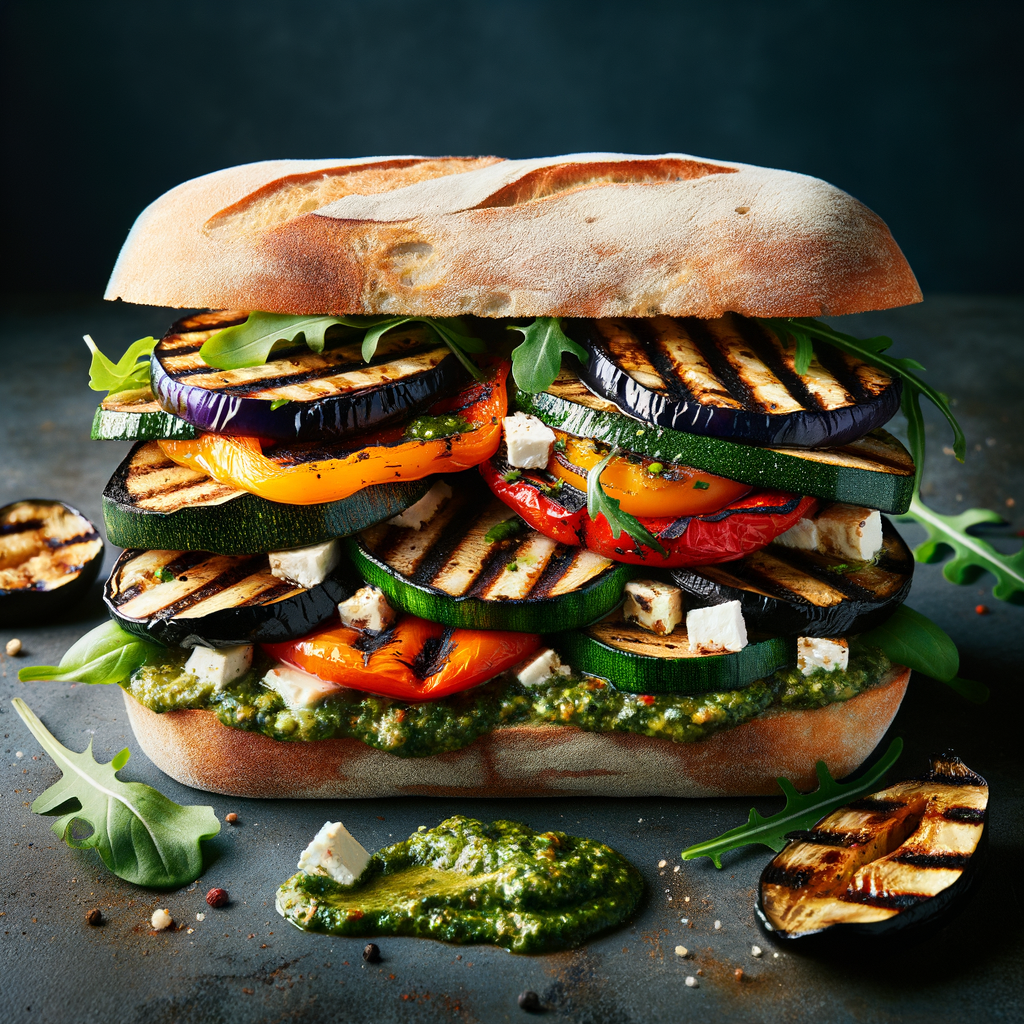
Assembling the Grilled Veggie Sandwich is an art in itself, a balance of flavors, textures, and colors. Start with a layer of a flavorful spread like hummus, pesto, or herb-infused mayonnaise on the bottom slice of the bread. This not only adds moisture but also acts as a flavor enhancer, complementing the grilled vegetables.
Next, layer your grilled vegetables. There’s no set rule on how to stack them, but a mix of colors and textures in each bite is what you’re aiming for. Adding a layer of greens such as arugula, spinach, or kale can introduce a fresh, peppery note that balances the hearty vegetables.
For those who enjoy a bit of creaminess in their sandwich, a slice of mozzarella or a sprinkle of feta cheese can be a delightful addition. Remember, the goal is harmony among the ingredients; each should be distinct yet cohesive as part of the whole sandwich.
Finally, top it with the second slice of bread (optionally spread with more of your chosen spread) and press down gently. You can even take the extra step of grilling the assembled sandwich for a minute or two on each side for a melty, toasty finish that is utterly irresistible.


